Fixing Broken Nails with Nail Glue
 Fixing Broken Nails with Nail Glue
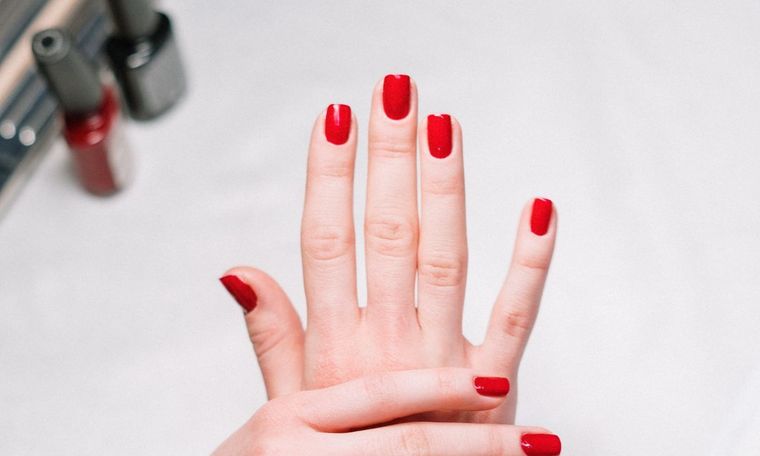
Nail emergencies happen to the best of us. With a bottle of trusty nail glue, you can quickly mend that unexpected break and flaunt flawless nails again. In this guide, we'll walk you through the process of fixing broken nails, turning a nail catastrophe into a quick and easy triumph.
We’ve all been there, nails snagging on fabric, catching on things, and, ouch, the unexpected break. But don’t let a broken nail dampen your day. With a simple solution like nail glue, you can patch up that nail in no time.
Assessing the Damage
Start by assessing the situation. What type of break are you dealing with? A small chip, a partial break, or a complete nail disaster? Understanding the extent of the damage helps determine if nail glue is the right remedy.
Type of Break
- Chip: A small, superficial break on the edge of the nail.
- Partial Break: The nail is damaged but not completely separated.
- Complete Break: The nail is split into two or more pieces.
Location
- Free Edge: Breaks at the tip are common and may vary in severity.
- Nail Bed: Deeper breaks may extend into the sensitive nail bed.
Extent of Damage
- Length: Measure how much of the nail is affected.
- Depth: Assess if the break is superficial or extends deep into the nail.
Understanding these aspects will help you tailor your approach. A chip might only need a quick fix, while a complete break may require a more thorough repair. Assessing the damage sets the stage for a precise and effective solution, ensuring you address the specific needs of your broken nail.
Gathering Supplies
Before you go through on your nail-saving mission, gather your tools. Nail glue, a nail file, and a clean workspace are your best friends. Remember, cleanliness is key, so make sure your tools are sanitized.
Nail Glue
- Choose a quality nail glue: Opt for a reliable brand with strong adhesive properties.
- Check the expiration date: Ensure the glue is fresh for optimal performance.
Nail File
- Select a gentle nail file: Choose a file with a fine grit to shape the nail without causing further damage.
- Emery board or glass file: These are gentle options that won’t exacerbate the break.
Clean Workspace
- Sanitize your tools: Cleanliness is crucial for preventing infections.
- Well-lit area: Ensure you have proper visibility to work with precision.
Cotton Swabs or Applicators
- For cleanup: Have these on hand to remove excess glue for a neat finish.
- Dip in acetone: Useful for quick cleanups if needed.
Tweezers or Nail Clippers
- For handling broken pieces: Use tweezers to hold small nail fragments or nail clippers to trim if necessary.
Nail Polish Remover
- Acetone-based: Useful for cleaning the nail and removing any existing polish.
Paper Towels or Tissues
- Quick cleanup: Keep these nearby to wipe away any spills or excess glue.
Optional: Nail Repair Kit
- Pre-made kits: These often include nail glue, nail tips, and other tools for comprehensive repairs.
By ensuring you have all these supplies in place, you set yourself up for a seamless repair process. A well-prepared workspace and quality tools contribute to the success of fixing your broken nail with precision and care.
Preparing the Nail
Now that you’ve gathered your supplies, it’s time to prepare the broken nail for the magic of nail glue. This step is crucial for creating a clean canvas that allows the adhesive to work effectively and ensures a secure and lasting repair. Clean the broken nail and its surroundings. A tidy canvas ensures optimal adhesion. Shape the broken nail with a gentle touch, preparing it for the magic of nail glue to work its wonders.
Clean the Nail
- Remove any existing polish: Start with a clean slate by using nail polish remover to eliminate any remnants of polish.
- Sanitize the nail: Clean the nail surface to ensure there’s no dirt or debris that might interfere with the adhesive.
Shape the Broken Nail
- Use a gentle touch: Employ a fine-grit nail file, emery board, or glass file to shape the broken nail.
- Maintain the natural curve: Shape the nail to match its original form, creating a smooth transition from the break.
Smooth Edges
- Avoid sharp edges: Ensure there are no jagged edges that could catch on things or further damage the nail.
- Gently round the edges: Smooth out the edges for a more polished and comfortable finish.
Trim Excess if Necessary
-
Tweezers or nail clippers: If there are any loose or hanging fragments, carefully trim them to align with the rest of the nail.
-
*Caution is key: Be gentle to avoid causing additional stress to the nail.
Create an Even Surface
- Level the playing field: Aim for an even surface on both sides of the break to ensure a seamless bond.
- Balance is key: The more even the surface, the better the adhesive will distribute for a secure repair.
By Preparing the broken nail, you lay the foundation for a successful repair. Cleanliness and precision during this step contribute to the overall effectiveness of the nail glue, providing you with a beautifully restored nail ready to face the world again.
Application of Nail Glue
With the nail prepped and ready, it’s time to understand the application of the nail glue. This step requires a steady hand and attention to detail to ensure a secure bond that withstands daily activities. Follow these steps for a successful and polished application.
Apply a Small Amount
- Less is more: Start with a small amount of nail glue to avoid excess, which can lead to messy application and potential damage.
Use the Applicator
- Precision is key: If your nail glue comes with an applicator, use it for controlled and targeted application.
- Cotton swab alternative: Alternatively, a cotton swab can be used for precise application.
Place the Broken Pieces Together
- Align with care: Gently bring the broken pieces together, ensuring a perfect match.
- Hold firmly: Apply slight pressure to encourage a snug fit.
Hold in Place
- Patience pays off: Maintain gentle pressure on the repaired nail for at least a minute to allow the glue to set.
- Avoid excess movement: Minimize hand movements during this time to prevent disrupting the bonding process.
Wipe Excess Glue
- Quick cleanup: Use a cotton swab dipped in acetone to wipe away any excess glue around the edges.
- Neat finish: A clean application ensures a polished and natural look.
Allow to Dry Completely
- Avoid rushing: Patience is crucial. Allow the glue to dry completely before engaging in regular activities.
- Follow product guidelines:* Refer to the specific instructions on your nail glue for recommended drying times.
Seal with a Clear Top Coat (Optional)
- Finishing touch: If desired, apply a clear top coat to provide an extra layer of protection and enhance the overall appearance.
Remember, precision during application contributes to the longevity of the repair. Taking the time to ensure a seamless bond will result in a beautifully restored nail that looks and feels natural.
Ensuring Longevity of the Fix
Your newly mended nail deserves some tender loving care. Discover tips on maintaining the repaired nail’s integrity during daily activities. It’s not just about fixing; it’s about making the fix last. Follow these tips to maintain the integrity of the repair.
Avoid Excessive Moisture
- Limit water exposure: Prolonged water exposure can weaken the adhesive. Use gloves while doing dishes or engaging in water-intensive activities.
Be Mindful of Nail Stress
- Gentle handling: Minimize activities that put excessive stress on your nails, such as opening cans or engaging in vigorous tasks.
- Use tools: Whenever possible, use tools instead of your nails for tasks.
Protect Against Harsh Chemicals
- Gloves for cleaning: When using cleaning products or harsh chemicals, wear gloves to protect both your nails and the adhesive.
Regularly Check and Maintain
- Visual inspection: Periodically check the repaired nail for any signs of lifting or damage.
- Prompt repairs: If you notice any issues, address them promptly with additional nail glue.
Moisturize and Care for Cuticles
- Healthy surroundings: Keeping your nails and cuticles moisturized promotes overall nail health.
- Cuticle oil: Apply cuticle oil regularly to nourish the nail bed and surrounding skin.
Avoid Biting or Picking
- Hands off: Resist the urge to bite or pick at the repaired nail. This can compromise the bond and lead to further damage.
Trim and Shape Regularly
- Maintain a consistent length Regularly trim and shape your nails to prevent uneven pressure on the repaired area.
Consider a Professional Check
- If in doubt: If you experience any concerns about the repair or encounter issues, consult a nail professional for advice.
By incorporating these practices into your nail care routine, you’ll contribute to the long-term success of the repair. A mindful approach to nail health ensures that your beautifully restored nail stays intact and looks its best.
Conclusion
In conclusion, fixing broken nails with nail glue is an art anyone can master. Recap the steps, feel the satisfaction of a successful fix, and confidently showcase your flawless nails once again. With a little know-how and the right tools, broken nails will be nothing more than a brief hiccup in your nail journey. So, here’s to quick fixes, flawless nails, and the empowering magic of nail glue!
Comments
There are no comments yet.